This article is meant to assist with explaining how to add the GoLinks Confluence add-on within the GoLinks dashboard. Completing the Confluence add-on will only be successful for those individuals who currently have administrator capabilities within their confluence workspace.
What Is The Confluence Add-on?
The Confluence Add-on allows users to use GoLinks within their Confluence workspace. If your team has not connected a users account, you will be able to make your go links into clickable links on the page. If a team member has connected an account, you will be able to set up the feature for auto generating new go links along with the clickable links ability.
Connecting with Confluence
To start, you will want to start by opening your Golinks homepage. From there, select “Integrations” in the left column of your dashboard.
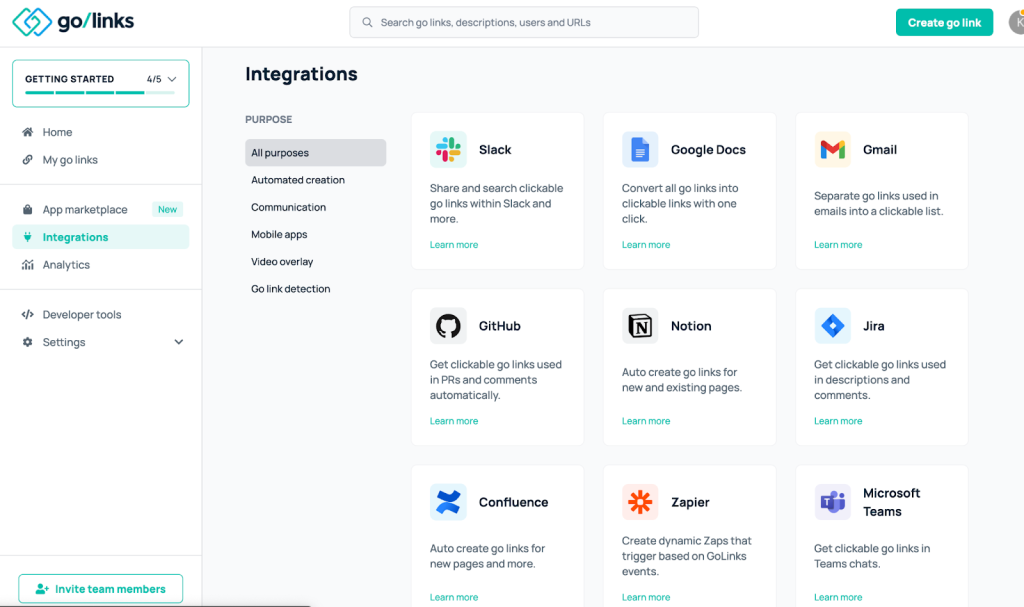
On your integrations page, click on the one labeled “Confluence”. This will open up the confluence app information page where you can read about the features the add-on provides.
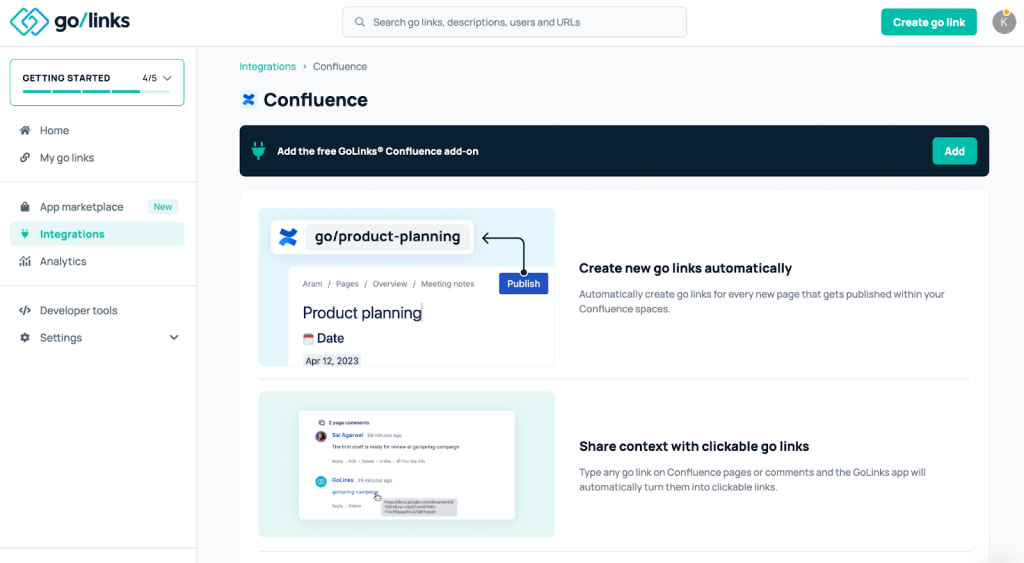
Downloading The Confluence App
In the top right corner of your confluence integration page, you will see an “add” button. Clicking this button will take you to the following page:
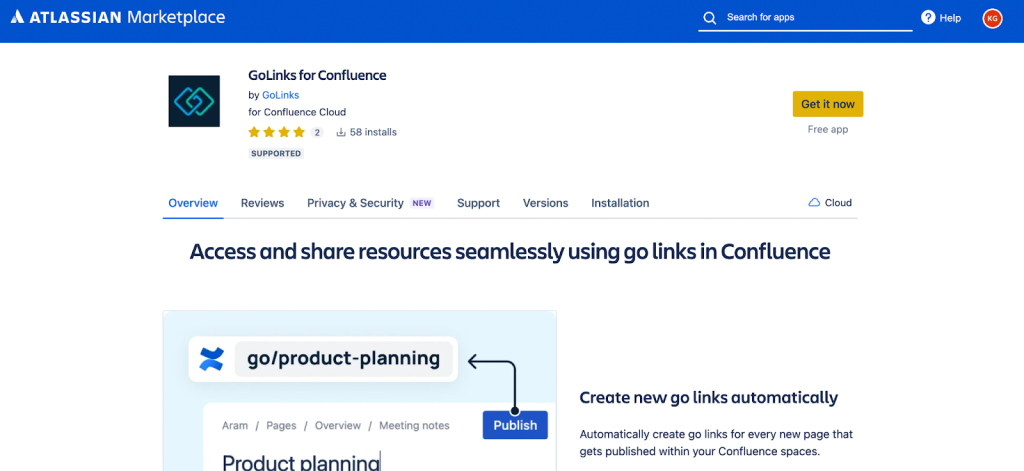
By clicking here, you are able to reach the confluence app marketplace directly. Clicking “Get it now” will prompt the addition of the GoLinks app for our Confluence account.
**If you are presented with the following pop up after downloading, select “Cancel”:
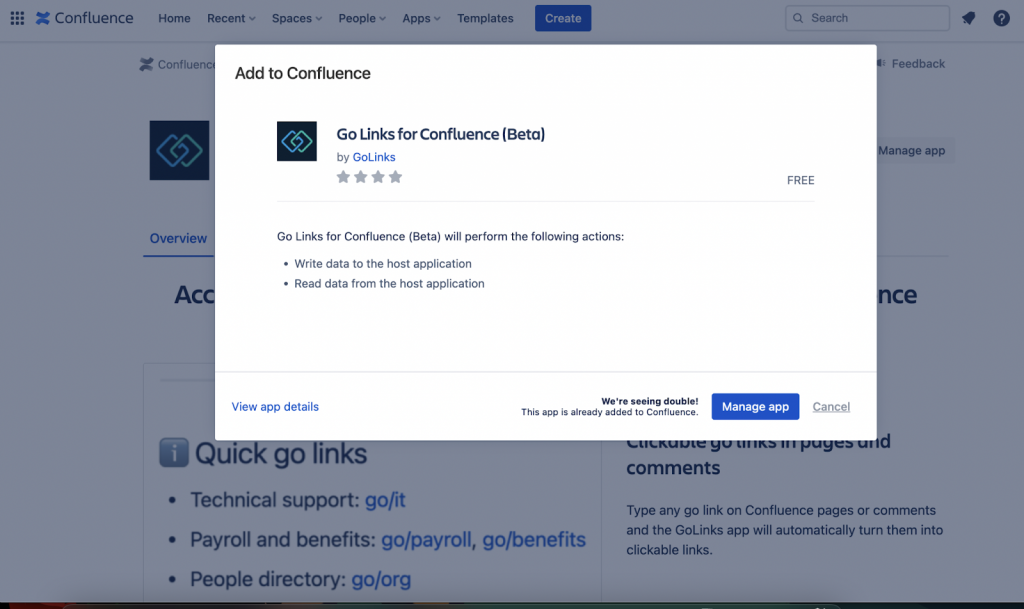
You will then have the Confluence add-on successfully added. With this completed, you are now able to automatically convert “go/links” into clickable links within your confluence pages.
Connecting an account
Connecting an account allows for you to auto-generate new go links based off the title of the confluence page you create. Keep in mind that all new auto-generated go links will appear as being created by the connected user.
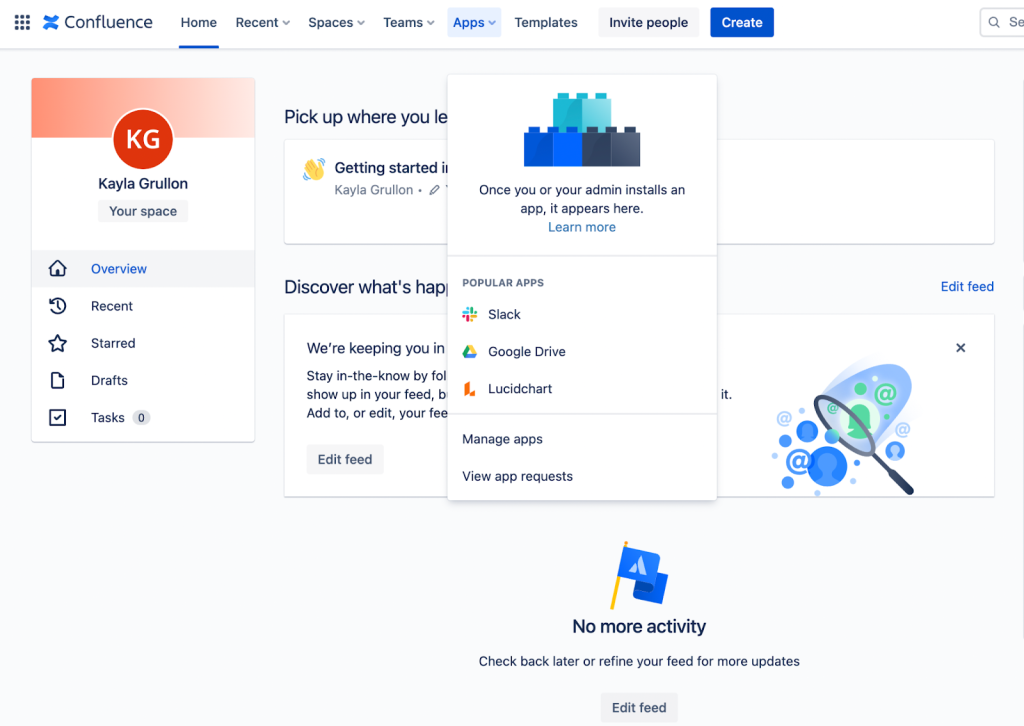
In order to connect an account, go to your Confluence workspace. Go to the “apps” dropdown and select “manage apps”.
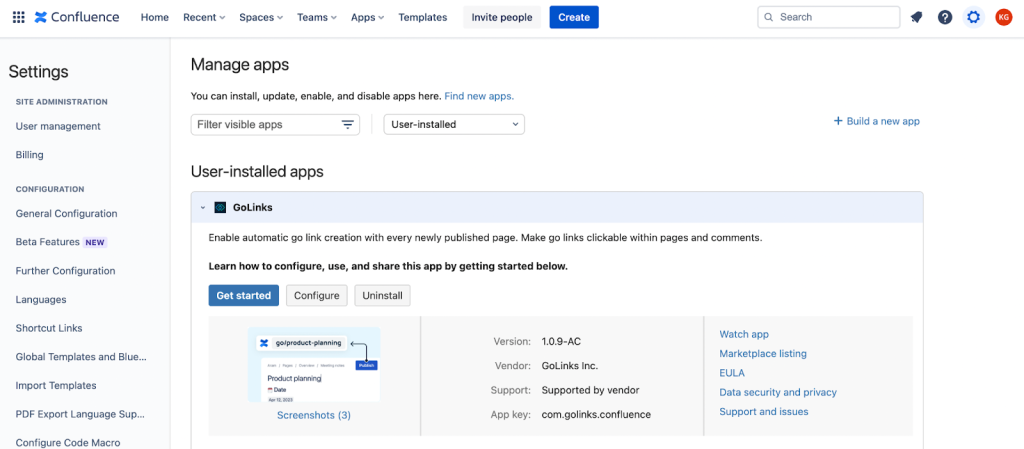
Use the drop down arrow next to the “GoLinks” app which will then open up the options for the app. Select the option labeled “Configure”.
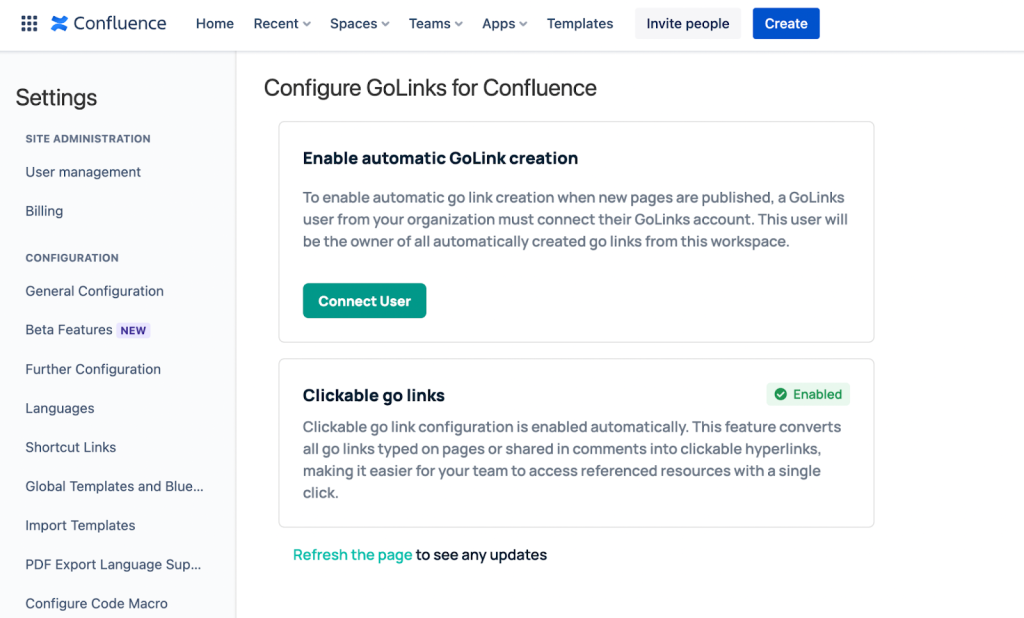
This will take you to a new menu. On this page, you will see the first option allows for you to connect a user. Here is where you will directly connect your GoLinks account and your Confluence account.
Now that you have the connection completed, any new page created through confluence will be made into a go link your team can easily use to navigate back to this page.
Changing the connected user
If you would like to update the connected user, refer back to the “manage” step of connecting an account. Once on this page, you will see what user is connected. Next to them, you will see an option to change the connected user. This button will allow for you to go through updating the selected user. Only one user can be connected at a time.
Disabling the auto-generation of new links
If your team decides to no longer auto-generate new go links, you can turn this feature off and revert back to just having clickable links within your confluence pages. This can be done by visiting your connected apps tab and removing access to GoLinks. You can easily access this page by visiting the GoLinks configuration segment and clicking the button in the second section.


