GoLinks allows for teams to quickly share and create shortened links to be shared with team members. These links can be essential for saving time during the work day. Sometimes a user creates a link, but the link name isn’t as beneficial to you as you would like. With aliases, you are able to add additional names to existing go/links.
What is an Alias
An alias is an additional name given to a go/link of your choosing. An example of an alias would be naming a go/link go/mail, with aliases being go/m, go/gmail, or go/mailbox. Whatever go/link will help you to get to your destination URL is what you should use. The alias tool within GoLinks allows for all alias destination urls to be changed with one quick change rather than having to change each URL individually.
How to add an Alias to an existing go/link
Aliases can only be created with unused go/link names. The following steps outline how to create new aliases.
- In order to add an alias, you will need to locate the existing go/link name for the url address you are wanting to navigate to. This can be found on your dashboard at golinks.io.
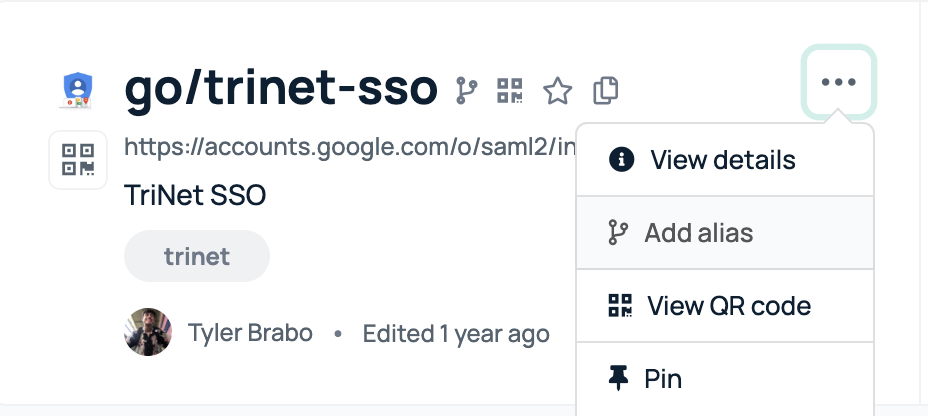
- Once you have found the go/link, hovering over the go/link will prompt a few symbols to pop up next to the go link name. Click the one labeled aliases. If it’s easier, users are also able to click the three dots to open a menu which includes the option for aliases.

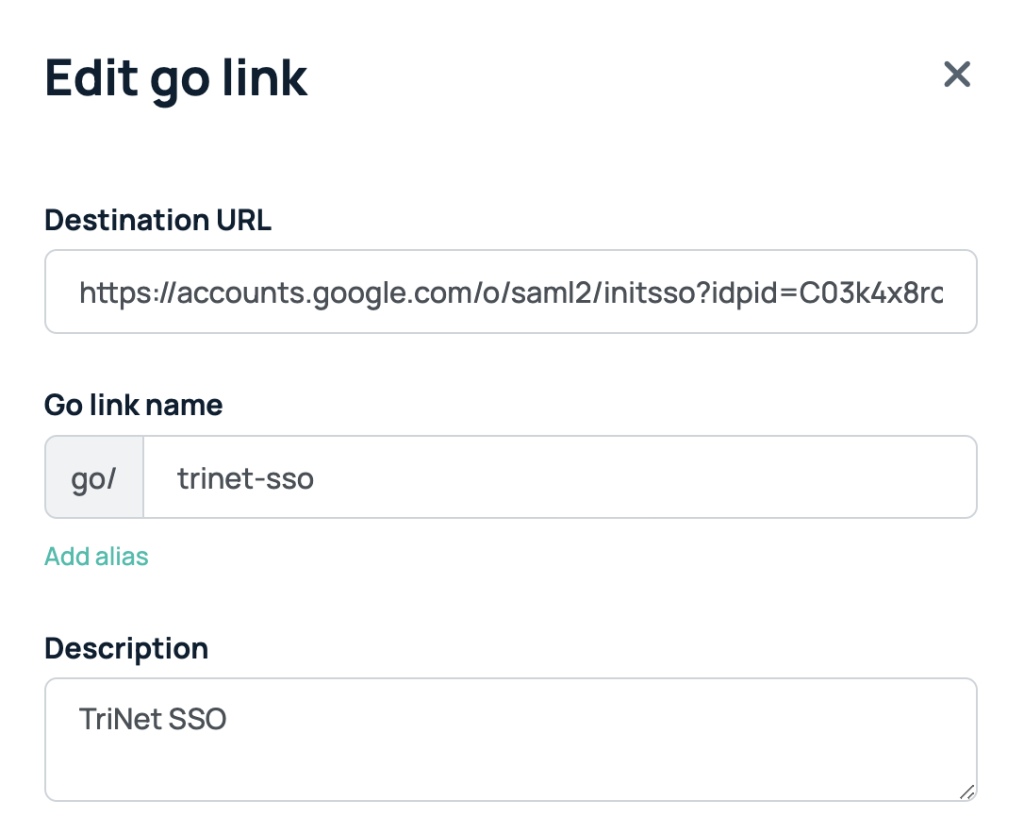
- A pop-up will appear showing the original go/link information and any existing aliases. Under all existing aliases, there will be an empty field allowing you to enter your new go/links alias name(s).

- If you are wanting to add more than one alias, there is an option to add additional aliases under the one you just created.
- If necessary, you are also able to update the description of the go/link and all its aliases.
- Once you are done making changes and adding aliases, be sure to save changes at the bottom of the page.
How to add an alias when creating a new golink
When you create a new go/link via the dashboard or the extension, you can add other aliases in the same creation modal. This is the best method when setting up a company and creating the initial go/links.
- Open the browser extension or go to the golinks.io dashboard and hit the “Create go link” button in the top right corner.
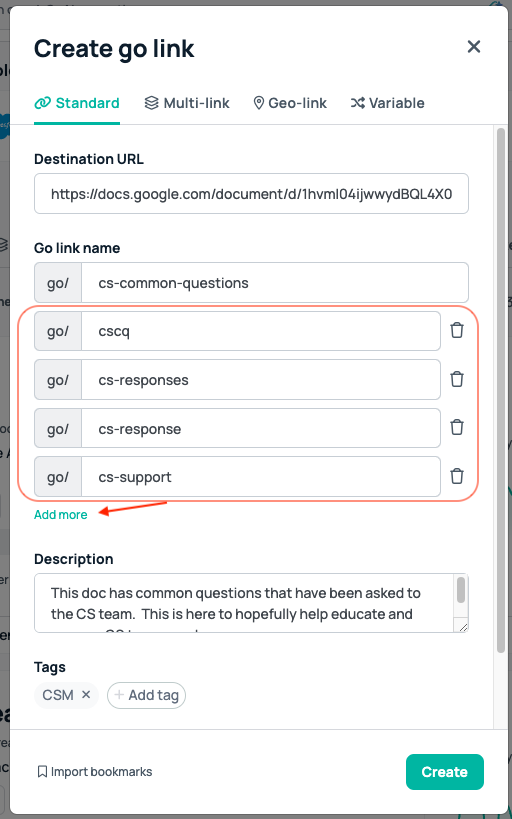
- When you fill out your new go/link information you can add an alias, or multiple aliases there.

- In the example above there are 4 aliases that were added to the base new go/link
- Now anytime the main go/link’s URL is altered (go/cs-common-questions), all the aliases with it will be altered too. Only 1 change needed to be made for all 5 links.
Who can add an Alias
Aliases are able to be created by any user who has edit permissions within a workspace. If a user does not have permissions to edit a go link, they will need to reach out to a workspace admin to either have them complete the edit, or to request edit access themself.


