Geo-links are a versatile feature in the GoLinks platform that enables seamless redirection to different destination URLs based on the user’s geographical location. This functionality is particularly useful for international teams that require access to region-specific tools, platforms, and documents. Below, we’ll guide you through creating and using geo-links effectively.
What are Geo-links?
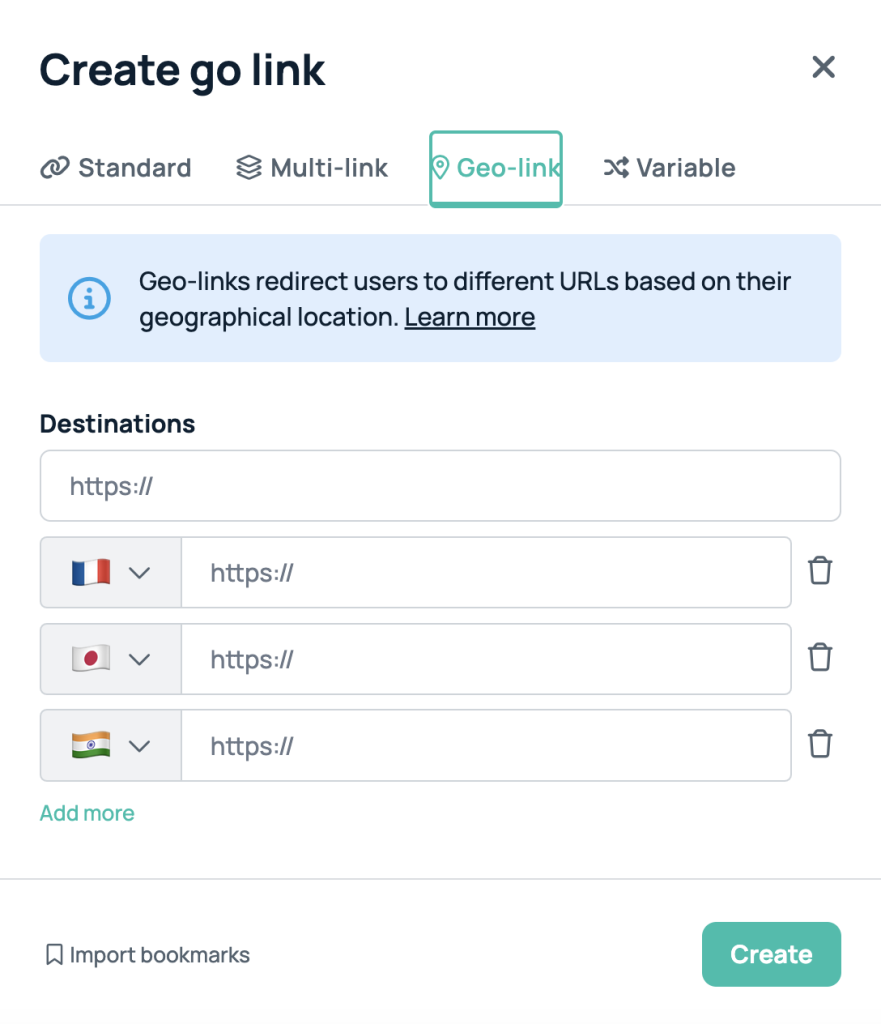
Geo-links allow you to use a single go link that directs users to different URLs depending on their geographical location. For example, a go link such as go/benefit can redirect Canadian users to a specific benefits portal while redirecting UK users to a different one.
Creating Geo-links
- Log in to your GoLinks dashboard and click “Create go link” in the top

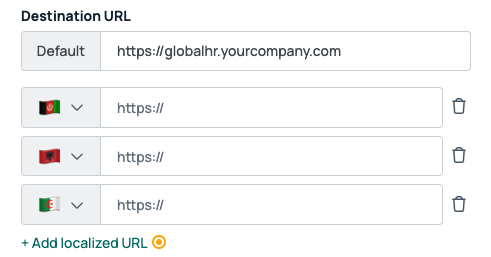
- For the default URL, enter the general HR portal URL (e.g., https://globalhr.yourcompany.com).

- Click “Add Localized URL”: and add URL for the specific country.
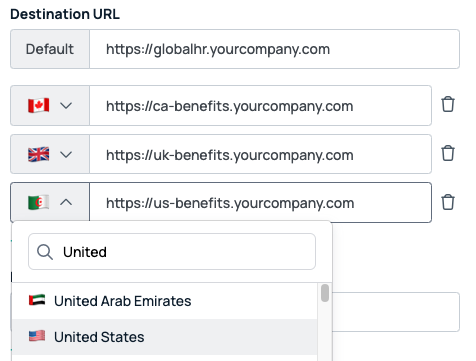
- Add each localized URL and assign it to the respective country using the dropdown menu.
- Name your geo-link: (eg. go/benefit)
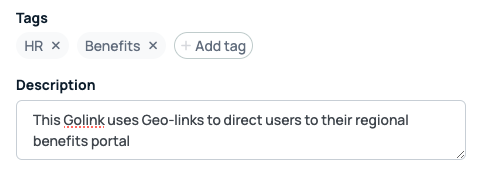
- Add a description to specify this go link uses geo-links to direct users to their regional benefits portal. Add any relevant tags, such as “HR” or “Benefits”.
- Click “Create” to finalize and save the Geo-link.
Usage Example
Once created, you will use the geo-link the same way as any other go link. Employees can use go/benefit and be redirected to the correct benefits portal automatically based on their geographical location:
- Canadian employee types go/benefit → Redirected to https://ca-benefits.yourcompany.com.
- UK employee types go/benefit → Redirected to https://uk-benefits.yourcompany.com.
- US employee types go/benefit → Redirected to https://us-benefits.yourcompany.com.
Questions?
If you have any questions, comments, or suggestions, feel free to reach out to our support team. You can reach us by using the support chat in the bottom right corner, or emailing support@golinks.io


