Features
Push new users
New users created through Azure AD will also be created in GoLinks.
Push Profile Updates
Updates made to the user’s profile through Azure AD will be pushed to GoLinks.
Push User Deactivation
Deactivating the user through Azure AD will deactivate the user in GoLinks.
Note: Deactivating a user will not delete their GoLinks account. Their status will be set to inactive.
Reactivate Users
Reactivating the user through Azure AD will reactivate the user in GoLinks.
Note: Reactivating a user will set their status to active in GoLinks.
Requirements
Before you configure provisioning with Azure AD, make sure you have configured SAML 2.0 for GoLinks. Be sure you have completed the steps in the SSO integration guide before continuing. After setting this up, you will need to contact the GoLinks Support team (support@golinks.io) or your Customer Success Manager to request a SCIM API/Secret token.
Configuration Steps
Configure the Provisioning settings for GoLinks:
API Integration
- Sign in to the Azure AD portal, select Enterprise applications and select All applications.

- Select the GoLinks application in the applications list.

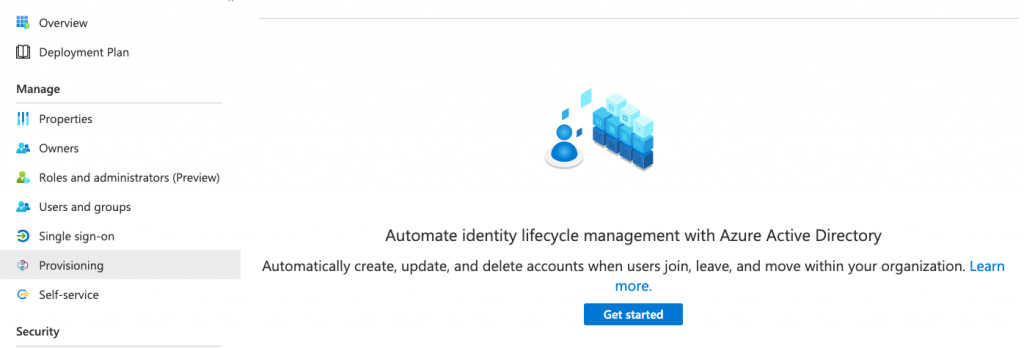
- Go to the Provisioning tab and click on Get started.

- in the Provisioning Mode menu, set the value to Automatic.

- In the Admin Credentials section, enter the Tenant URL (https://api.golinks.io/scim/v2) and the Secret Token that you received from GoLinks. Click on the Test Connection button to verify the credentials. If everything looks good, click on the Save button to save the provisioning configuration.

Note: If your API Credentials test fails, check that the Secret Token is correct. If errors persist, contact the GoLinks Support team (support@golinks.io) or your Customer Success Manager.
- Under the Settings section, you will see the Notification Email field. Enter the email address of a person or group who should receive the provisioning error notifications. This is optional.

Provisioning Steps
- Under the Mappings section, select Provision Azure Active Directory Users.
- In the Attribute Mappings section, you can review the user attributes that will be synced from Azure AD to GoLinks. You do not have to do anything on this page as the mappings are already set up to sync with GoLinks.
| Attribute | Type |
|---|---|
| userName | String |
| active | Boolean |
| emails[type eq “work”].value | String |
| name.givenName | String |
| name.familyName | String |
| externalId | String |
| urn:ietf:params:scim:schemas:extension:enterprise:2.0:User:department | String |
- To configure scoping filters, refer to the instructions provided in the Scoping filter tutorial.
- Enable the Azure AD provisioning service for GoLinks by changing the Provisioning Status to On.

- In the Settings section under Scope, select the users or groups that you would like to provision. It’s recommended to select “Sync only assigned users and groups” to only sync users and groups assigned in the Users and groups tab.

- When you are done and ready to provision, click Save.
- This operation starts the initial synchronization of all users or groups defined in Scope in the Settings section. The initial sync takes longer to perform than subsequent syncs, which occur approximately every 40 minutes as long as the Azure AD provisioning service is running.
Assign the Application to Users/Groups
- If you choose “Sync only assigned users and groups” (recommended), navigate to the Users and groups tab and assign the users/groups you wish to provision.

- You can confirm a user was assigned the GoLinks application by checking that their Display Name is displayed in the Users and groups tab.
- You can also confirm the user was assigned to GoLinks by checking the Team Directory and searching for the new user.

Note: If you deactivate a user directly on GoLinks, the user will still be assigned to the GoLinks application in Azure AD. It is recommended to use Azure AD to update and deprovision users from GoLinks.
Monitor your deployment
Once you’ve configured provisioning, use the following resources to monitor your deployment:
- Use the provisioning logs to determine which users have been provisioned successfully or unsuccessfully
- Check the progress bar to see the status of the provisioning cycle and how close it is to completion
- If the provisioning configuration seems to be in an unhealthy state, the application will go into quarantine. Learn more about quarantine states here.
User Attributes
The following attributes are supported by GoLinks:
- Username: Username is set to the user’s primary email address. We recommend leaving this value as an email.
- Email: User’s primary work email address.
- Given Name: User’s first name.
- Family Name: User’s last name.
- Department: The department the user is associated with.
Troubleshooting and Tips
- We suggest keeping Azure AD as the source of truth.
- If you run into any issues or have questions, contact the GoLinks Support team (support@golinks.io) or your Customer Success Manager.


